
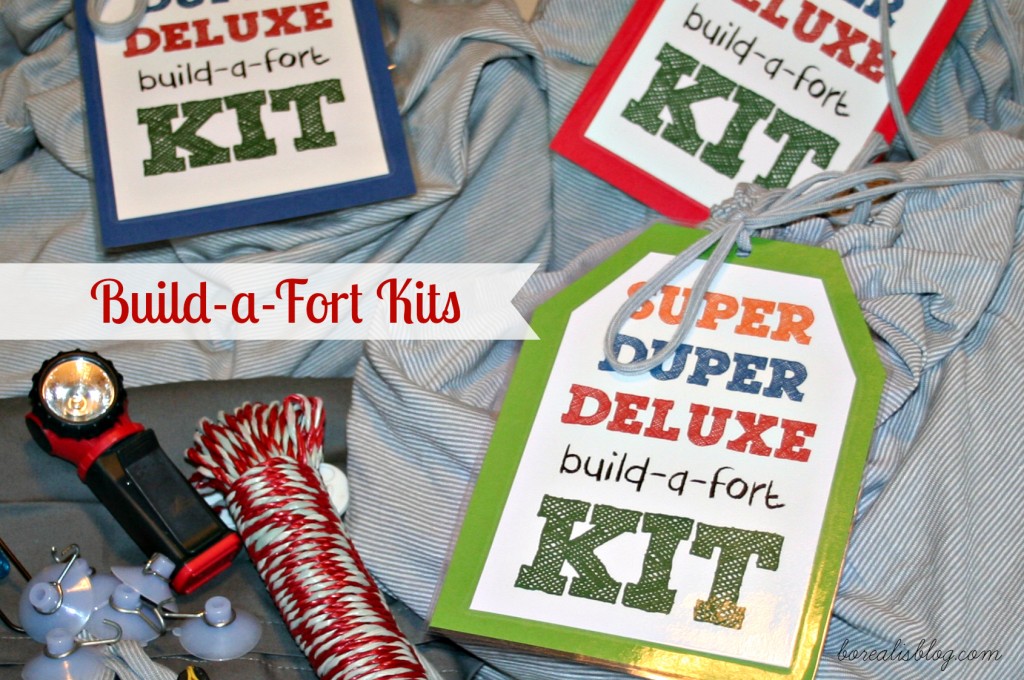
 Last holiday season I had significantly more time than I ever have for Christmas prep. My youngest was in all-day kindergarten and I was, for many hours at a time, a stay-at-home-alone-mom. I filled the time by making nearly every gift project I ever pinned, like these fort kits.
I got my inspiration from this tutorial, but there are many versions out there. What they have in common is the geniusness of the concept — of course kids want a flashlight, some bungee cords, clamps, and a really big sheet to make a fort. Why were we ever trying to make do with afghans and some couch cushions? Bonus points for this gift being something to play with that is not a toy; rather it is a bag filled with completely open-ended props for all kinds of creative schemes.
I made several of these — one each for my boys, one for my friend’s toddler, and one for my three-year-old nephew whose mom I knew would set it up right away and play in it with him. It took me about an hour to make all four.
How to make a fort kit
- Gather your supplies (list below)
- Make a drawstring bag out of the pillowcase
- Sew fabric ties all over the edges of the sheet
- Stuff everything in the bag you made
- Add a cute tag
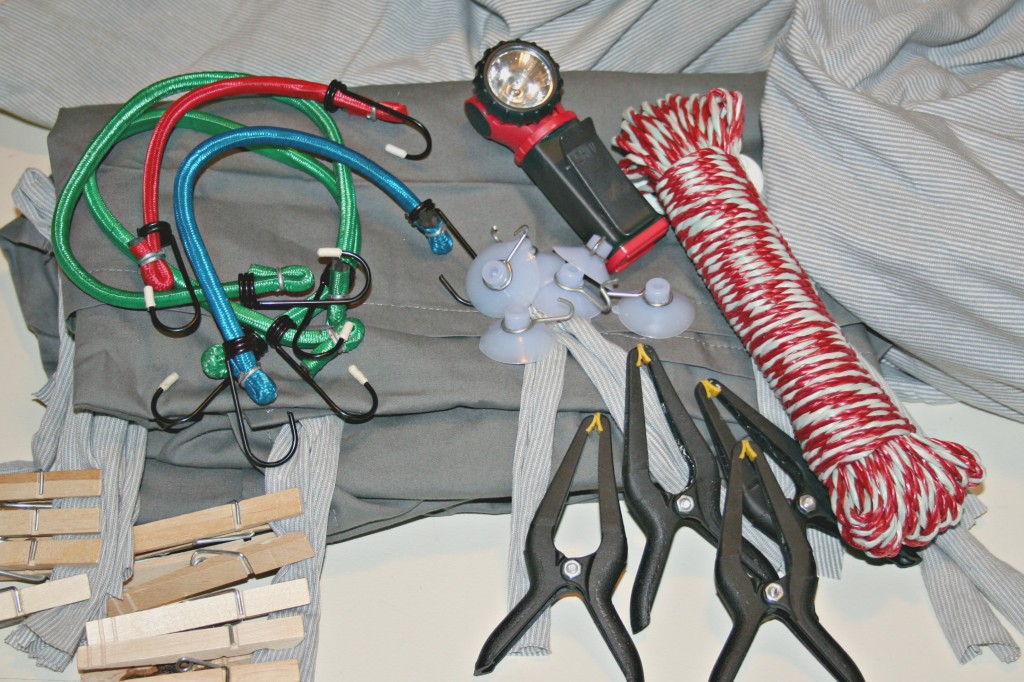
Fort-making supplies. The sheet and pillowcase came from Target; all the rest from the dollar store.
Gather your supplies
- Twin flat sheet
- Standard pillowcase (I used jersey and recommend that)
- Clothesline
- Clothespins
- Suction cup hooks
- Bungee cords
- Small clamps
- Flashlight
Make a bag and sew some ties
This is my kind of sewing — straight lines only, no precision required. You pretty much can’t mess this up.
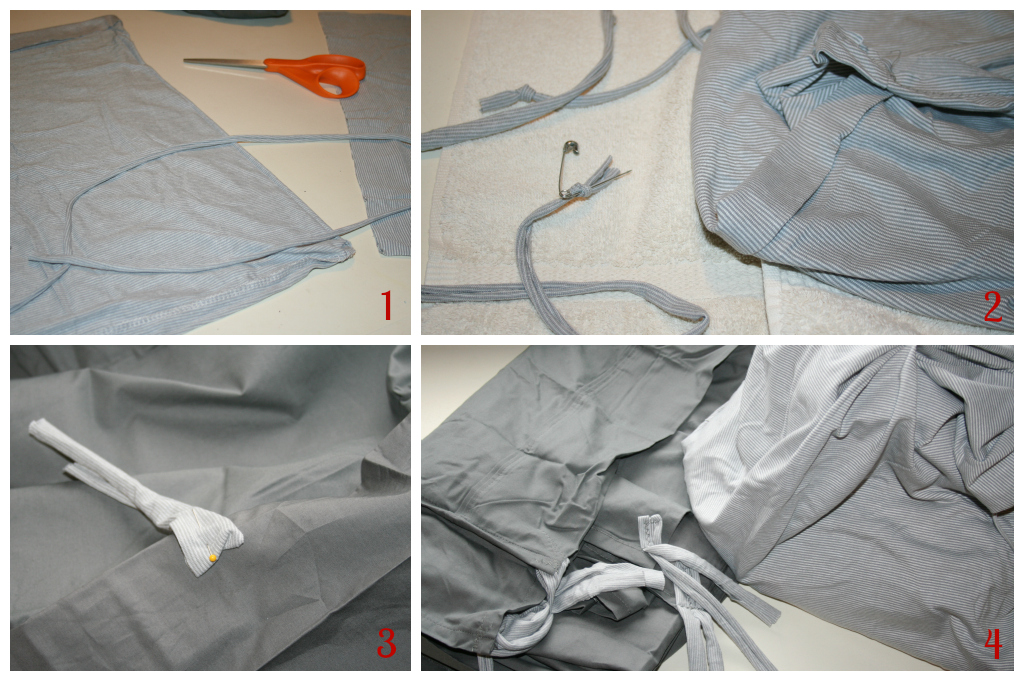 1. If you are using jersey pillowcases, you can make ties and your drawstring by just cutting off part of the pillowcase (the open end) and then pulling the fabric tight and letting it snap back. It will curl up like a cord, as in photo 1. Cut off two strips of pillowcase, one for your drawstring and one you will cut into shorter sections for ties.
2. Fold about 1.5 inches of the cut end of your pillowcase toward the inside of the case and sew it down to make a pocket. Leave both ends open and thread your cord through. Jersey will not ravel and does not need hemming, so just leave those open ends raw.
3. Pin the short ties around the edge of the sheet and sew down tightly. Run your machine back and forth over it a few times. Add as many or as few as you want; even just in four corners would be helpful.
4. You are done! Stuff everything in your bag.
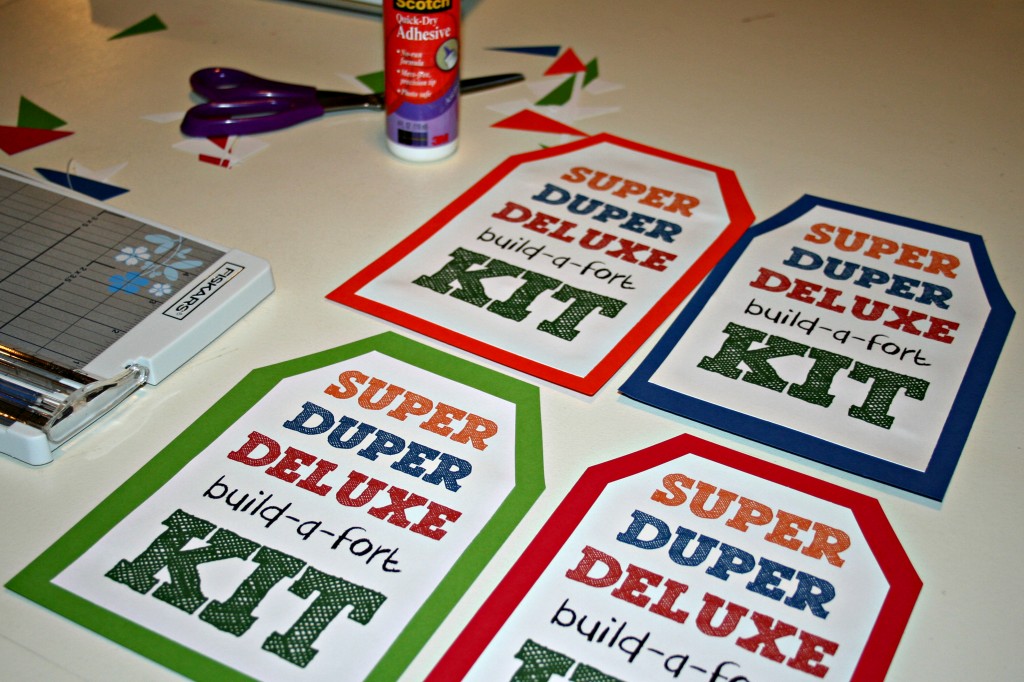
Now, the fun part: Cute labels
I really do believe that gifts are 80% packaging. I was completely tickled with these labels, made on my computer and glued to cardstock I had around and then laminated cuz I had that stuff around too. Totally optional but fun and brightened up my gender-neutral, non-offensive-to-stylish-moms gray color palette.
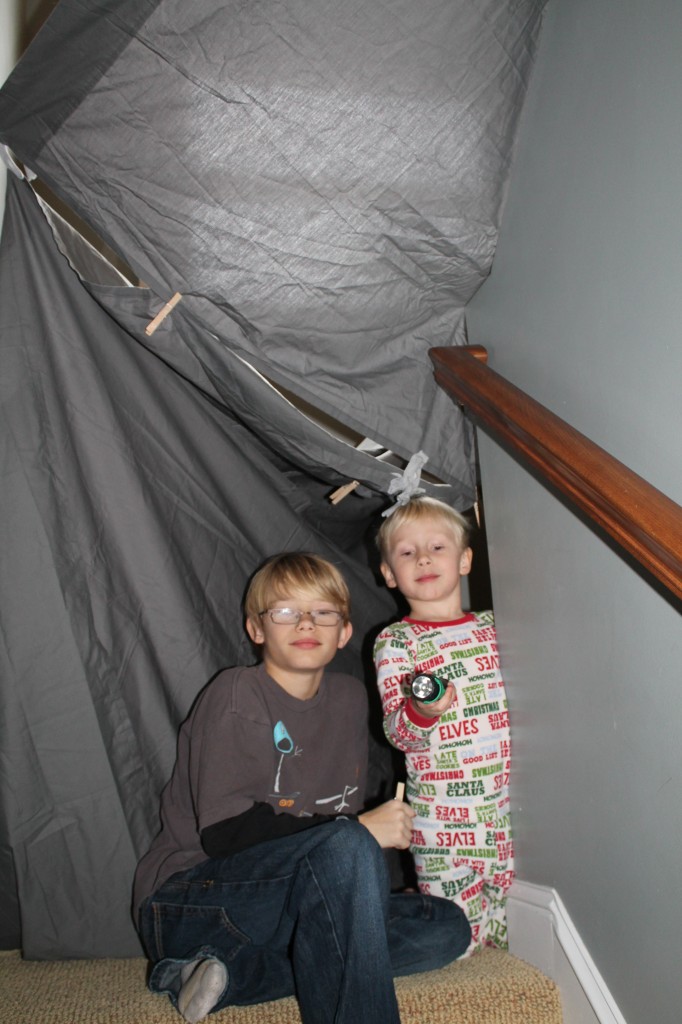
 That’s all it takes! Here is one of the epic forts my boys made with it.