

I live in a very old four-square style house in St. Paul. The cool thing about four-squares as they are just as described: square, with four bedrooms on the second floor, one in each corner.
Many years ago we gave up our guest bedroom for a home office. We own a business that we run out of our home, we both worked at home at night (too much) and needed desks and file drawers and space for his-and-hers computers, and I wanted a place for all the things that require space to work and zillions of small supplies and accessories — gift wrapping, sewing, photo albums, craft supplies, diorama construction with second graders, etc. (My husband just wanted a white board.)
This room is the second-largest bedroom and we use every inch of it, including this closet, which once held coats, suitcases, and the vacuum (all of which have been banished to the basement). And while the closet was reasonably well organized when we first made the switch, over the years it became this:
 It’s not really that bad, but plenty of things weren’t working. My idea to put ribbon on peg board hooks seemed like a good one, but if you can’t see the ribbon, you have to take them all off to find the one you want. The wrapping paper storage bin was something I had, but setting it inside the closet invited me to pile stuff on top of it. Stuff was just added randomly to the peg wall hooks, doubling or tripling up and hanging precariously. Lots of things fell down and disappeared behind the piles of stuff on the floor. What did work, though was the scissors and tape — never lost, always put away in the right place. So I had that going for me.
Here’s another view:
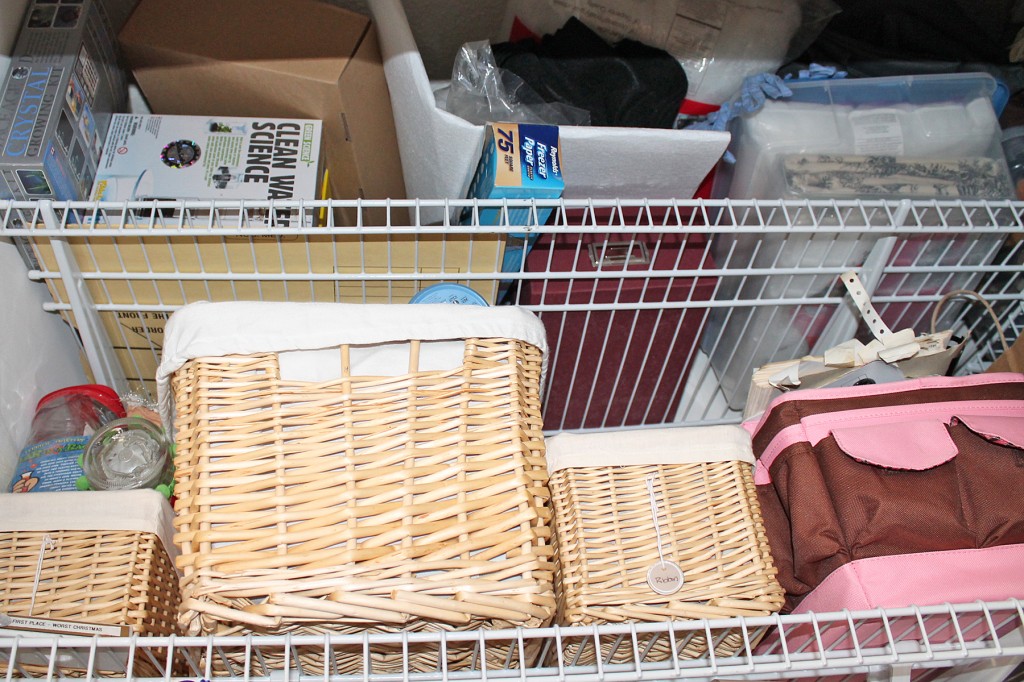 These are the shelves above the peg wall. All I use on any regular basis are the three baskets, holding ribbon pieces, tags, and boxes for gifts. So its easy to see why the other shelves got piled high with junk.
When I ran out of space on the floor, peg wall, and shelves, I added this to the door:
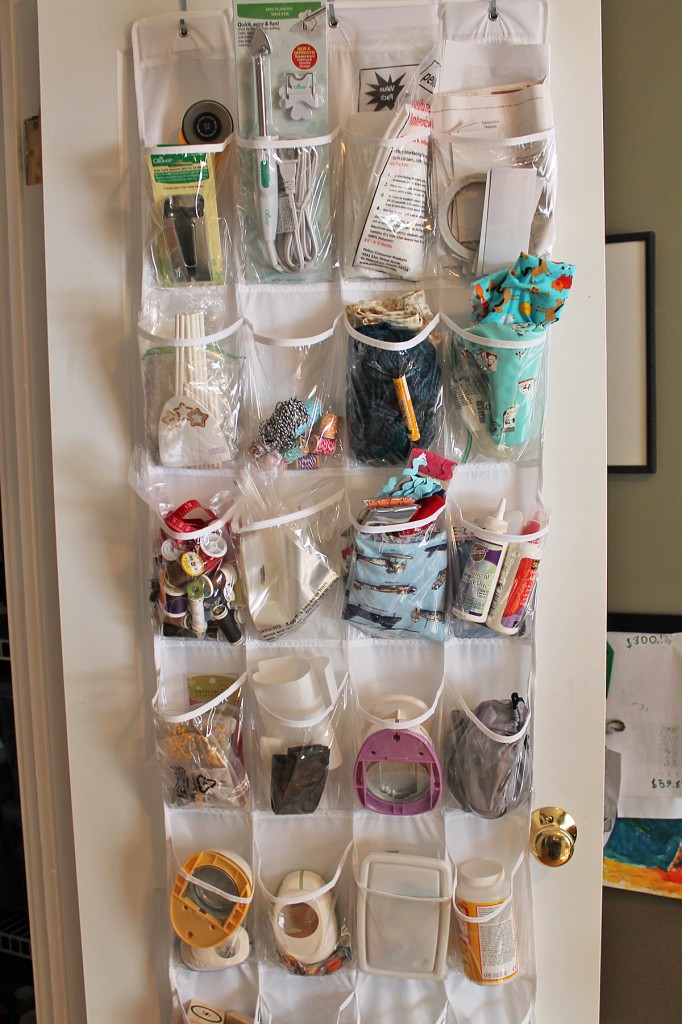 I saw this idea on Pinterest and added it with no real plan for what would go in it. So it began randomly collecting stuff. Not bad, just not the best use of space.
There are certainly worse closets in my house (maybe someday I’ll show you the linen closet), but this was bothering me because we use this room more than any other in the house after the kitchen. It has a desk for the boys, a large work table, and a storage bench/window seat. It is bright and pleasant in here and frequently all four of us use it together. I wanted it to be nice. So now it looks like this:
 I did buy some new supplies but mostly I just cleaned up, cleaned out, put away, and purged. I resisted buying all new storage devices that match (though I love that look), and focused on using what I had and finding a few new problem solvers. Here’s what I did (and where I got stuff that helped):
- I took everything out by category. I think this was good way to approach this task, because if I had taken every item out at once I might have cried at the overwhelming pile of junk. I sorted through one category per day, in the evening when Scott was in here working and I could have wine. I started with office supplies, then wrapping supplies, then kids craft stuff, then sewing, then other craft materials.
- I threw stuff out or put it in boxes for the school rummage sale in the spring. This includes the approximately 15 science kits given to my kids as gifts. Don’t tell them, or give them more. Please.
- I put things back in, by category, in the storage devices I had. Then I determined if those were enough or if I needed something different.
- I consulted Pinterest. That’s where I got the on-the-door wrapping paper idea.
- I went to the Container Store and took pictures of containment devices I thought would work, wrote down the measurements, and then came back how to confirm that it would fit. When I determined it would, I ordered the stuff online. (I’d honestly rather pay shipping than drive back to the store, but that’s just me.)
- I went to IKEA and just bought stuff I thought would work, figuring I go there often enough that I could just return what didn’t.
- Once I had my new containment devices, I reassembled the closet.
- Then I had fun with labels. I had to resist the urge to label things that were completely obvious or in clear containers making labeling redundant. Labeling is fun.
- I took photos for my mom, who will appreciate it, and made Scott stand and ooh and ahh with me. He was smart enough to be enthusiastic.
- I wrote a blog post. Always the final step in an organizing project.
If you are still reading you must like organizing things, so here are some more photos, details, and sources.
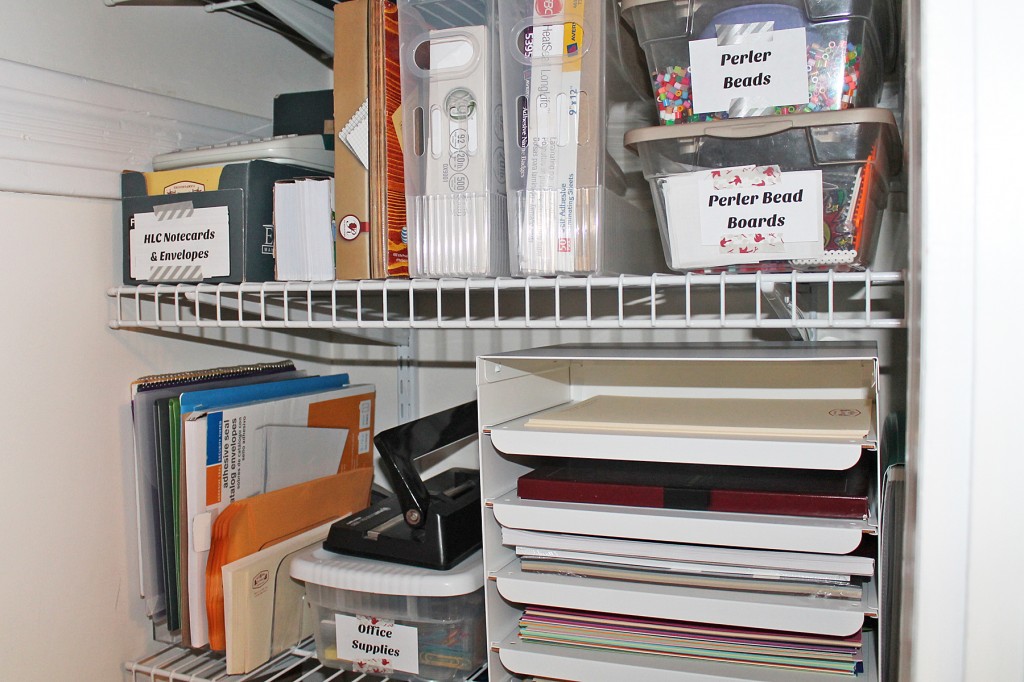 The office supply zone
To the extent I could, I made zones for the different categories. This is office supplies, and the only place my husband needs to access. I replaced the sagging plastic Office Max paper sorter with this metal one with sliding drawers from IKEA – much better. I also added the standing clear plastic bins (named “Multipurpose Bins”) from the Container Store to hold extra reams of paper and label sheets or other specialty printing things. I resisted taking the note cards out of the sturdy boxes they came in from the printers and putting them in some matching container because really, the box works fine. I could not resist a label and washi tape though. I perched my label maker on top of the note cards because we don’t use either very much. I’m okay with this.
Since there was a little room left, the kids’ Perler beads stuff shares the shelf. So my zones aren’t perfect. I’m okay with that too.
 The kid zone
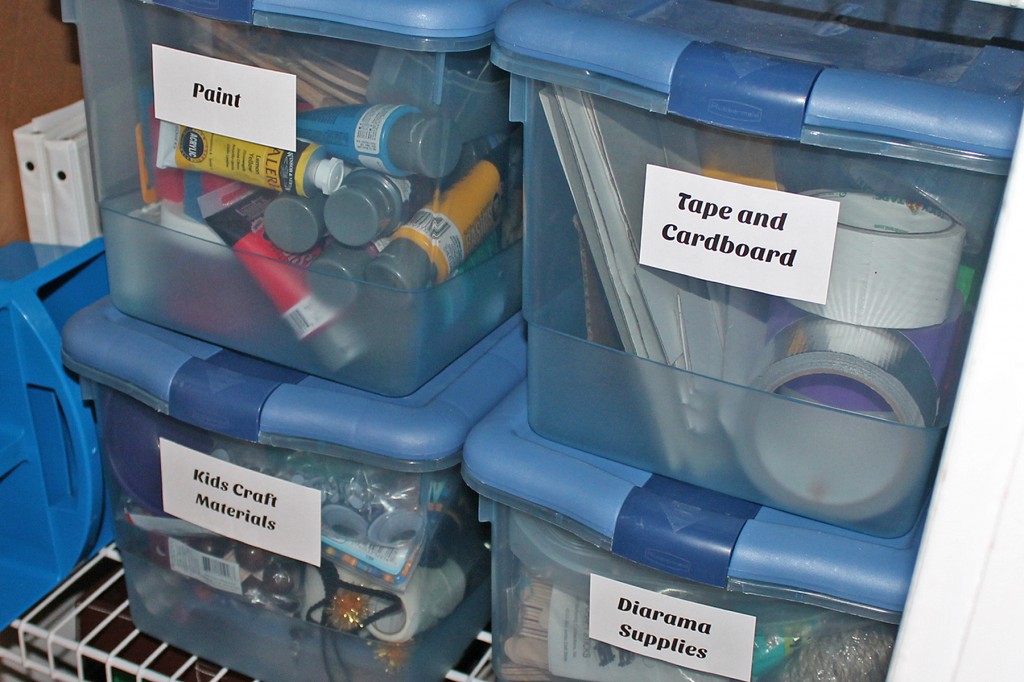
I had these blue bins from when we first set up the office and they work. All I did was go through the contents, sort, toss, combine like objects, and label. (I save bits of cardboard that come in packaging, especially if they are interesting shapes. Owen has an endless need for cardboard for all his schemes. Cardboard is up there with Legos as best all-time toy.)
 Sewing and crafts zone
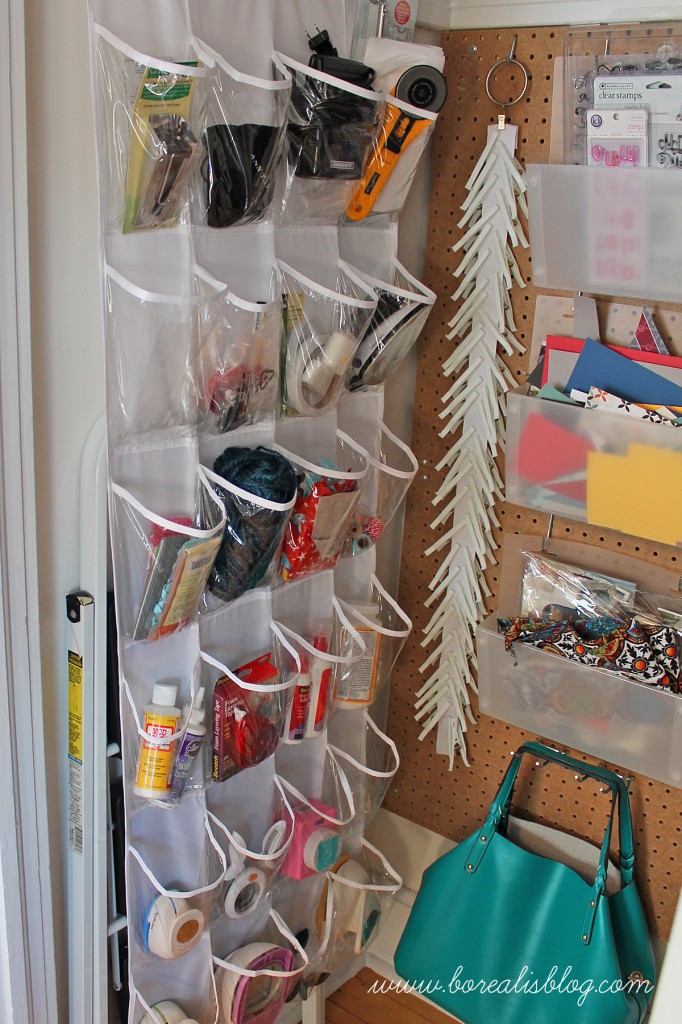
My zones break down a little here, because I’m the type of crafter that can’t settle on one or two things. I have a little bit of everything: beads, stamps, paper, sewing, mosiac tiles, silver leaf, plaster, you name it. Fortunately, a shoe organizer is perfect for those little bits of everything. I asked Scott to bolt this to the inside wall of the closet, which had been wasted space due to the wrapping bin sitting here. It now holds sewing stuff, glue (one whole row of different types of adhesives!), and paper punches. The step ladder (required for short person access to top shelves) hides behind it.
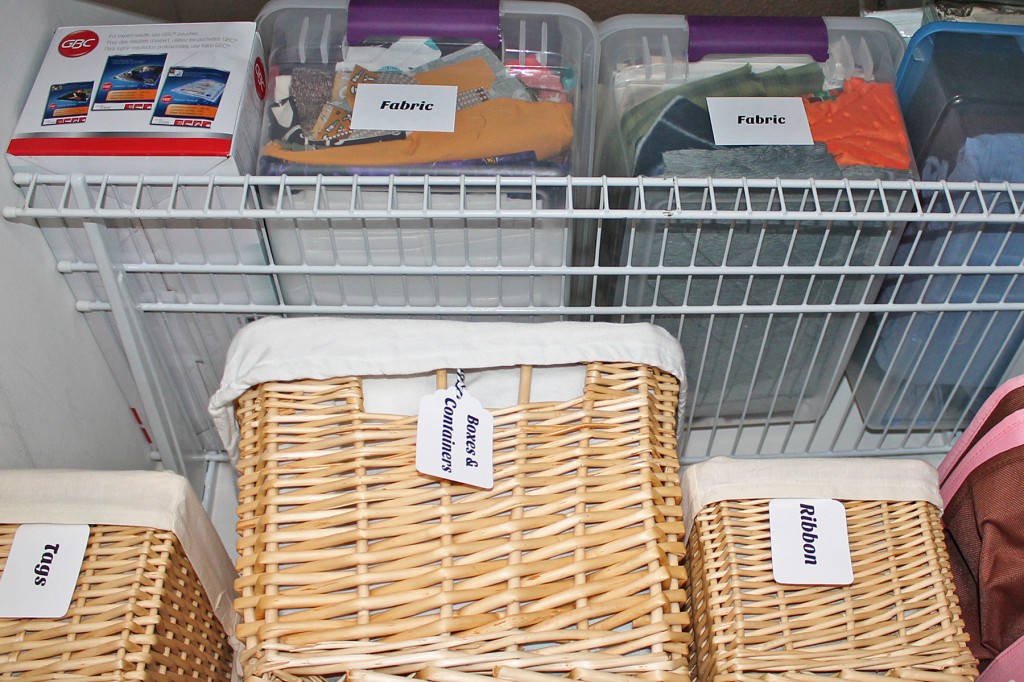 Top shelves, revisited
All I really did here is get rid of stuff that had no business being in this closet, sort fabric into bins, and label. But it looks so much better.
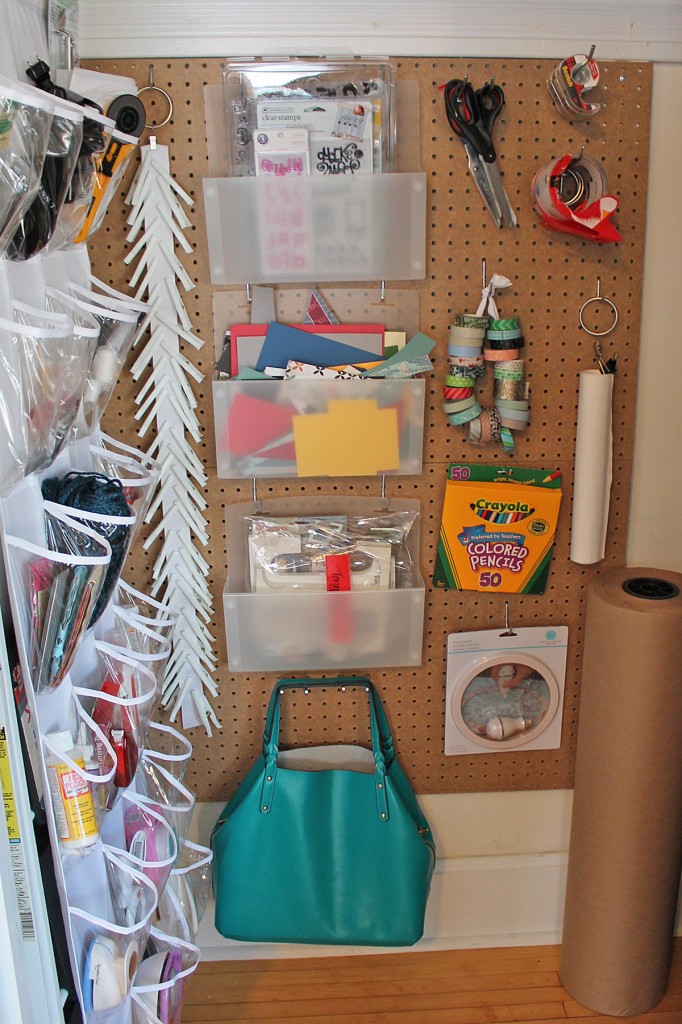 Peg wall, revisited
Here’s the prettier peg wall. (Some day I might paint it, since I seem to leave this door open all the time.)
The plastic wall pockets are from the Container Store. The top one holds stamps, the middle one paper scraps (which were previously in a manila envelope perched on top of the wrapping paper), and the bottom one holds projects in progress. The teal bag is my laptop bag, formerly a resident of the floor.
I did not change the one thing that was working: scissors and tape are in the same location. I found a few abandoned curtain rings with clips when I cleaned up the mess, so I used those to hold a ribbon clothespin hanger (those clothespins are more handy than you’d think), and a roll of kids art paper. I briefly considered buying a large dispenser for my washi tape, but a dispenser would have needed a spot on the shelf and this system works great. I don’t take the rolls off the ribbon to use them, I just take the whole thing with me.
Now, the best for last: the wrapping paper.
This is a Pinterest idea and I’ve seen a few versions. (In fact, I copied the supply list from this one exactly.) It was fast, easy, and I love it. So pretty and so functional.
Wrapping zone
The door rack is Elfa Door and Wall Rack System from the Container Store, and this is not cheap. Fortunately, it just slides onto the door and thus is moveable and reusable. I took all the ribbon off the pegs, all the wrapping paper out of the bins, and purged my way-too-large collection of gift bags. (I swear those multiply on their own.)
The bags I kept, plus usable small scraps of wrapping paper, and smaller kraft and cellophane bags stay upright in the top shelf thanks to another Multipurpose Bin from the Container Store. That also means I can take that down easily and find what I need without standing on tiptoes or disrupting the whole thing to get one bag out.
Another look, because it is so pretty.
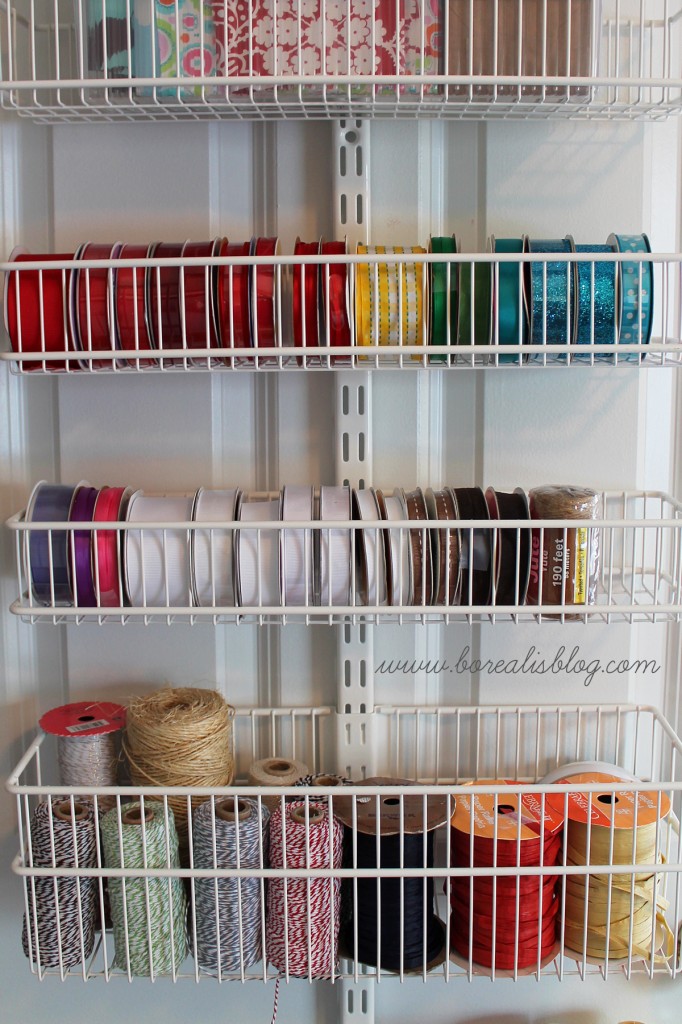 I mean, who wouldn’t arrange their ribbon in rainbow order?
It kinda makes me want to buy some orange.
Now, on to the linen closet.
Love the way you clean up everything and reorganized the closet! Looks so amazing! I should reorganize and clean my closet too because it is a real mess. Stunning ideas!
Thank you Lorraine!